
Interface Overview
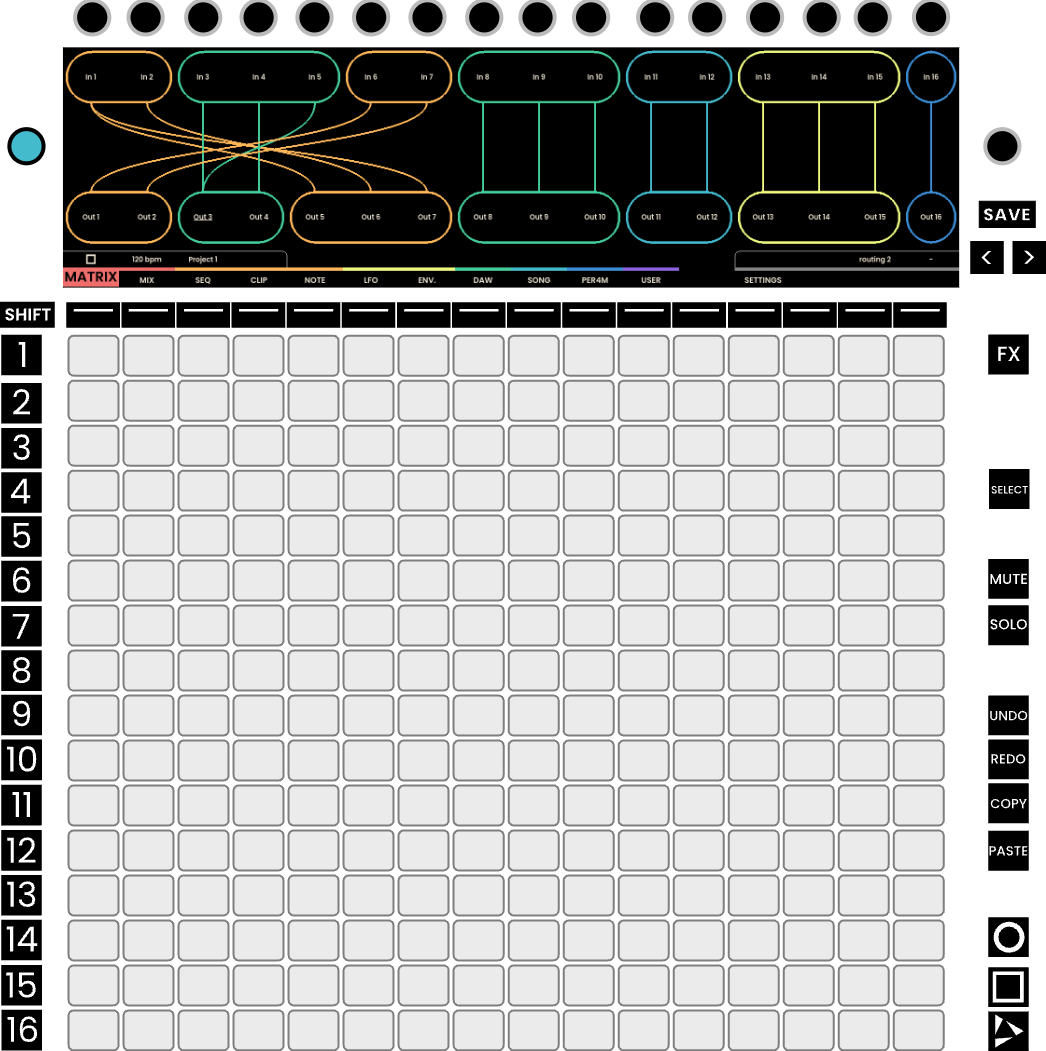
The physical interface of Reliq is composed of five main elements: encoders, page buttons, the 16x16 LED Grid Pads, track buttons, and function buttons. Each of these components has a specific role in controlling Reliq’s parameters and navigating its functions.
Encoders
Sixteen Encoders are positioned at the top of the interface, directly above the screen. These encoders correspond to the parameters displayed on the screen for each active page. Adjustments to parameters such as pitch, velocity, or other settings are made by turning the encoder aligned with the relevant parameter on the screen.

Page Buttons
Below the screen, the Page buttons are located. These buttons provide direct access to the main functions of Reliq. Each button corresponds to a specific page, such as the Matrix Page or Sequencer Page, as indicated by the labels on the screen directly above them. When a page button is pressed, the interface immediately switches to the associated function.

16x16 LED Pad Grid
The Grid Pads serve as the primary interface for event management. It is used for various functions, including connection management in the Matrix Page and pattern arrangement in the Sequencer Page. Each row and column of the grid is mapped to a specific input, output, or event, depending on the active page. The grid is utilized to create and manage connections or patterns, allowing for direct interaction with signal routing or sequencing.
Joystick Encoder
In the upper right corner of the interface, adjacent to the screen, the Joystic Encoder is found. The joystick encoder can be rotated and clicked in four directions (up , down , left , right ). It is also pressable to confirm selections. This component is primarily used for navigating between different menus, nodes, or settings on the screen. The joystick encoder allows for precise control during the selection process, whether adjusting parameters or moving through lists.
BPM Encoder
On the left side of the interface, the BPM Encoder is located. This illuminated encoder is dedicated to setting the tempo (Beats Per Minute) of the system. Turning the encoder adjusts the BPM, which controls the overall timing of sequences and events. The illuminated feedback ensures that tempo adjustments are visible during operation.