Quick Start Guide
Welcome to Reliq! Reliq is a Hybrid Control Surface designed to connect analog inputs to analog outputs, sequence MIDI, USB, CV, and Gate signals, and control DAWs. This Quick Start Guide will help you set up your device, connect your gear, and start making music.
Note
If you just received your Reliq, we recommend updating to the latest OS version before you start. This ensures access to all the features in this manual and overall software stability. You can find more instructions on how to update in the Settings Chapter.
In the Box

Unpack the Device
Remove the main Reliq unit from the box and take it out of the bag. Place it on a flat, stable surface.

Remove the Breakout Module from its bag and place it next to Reliq.
Unpack the Accessories
Unpack the USB cables and the Power Supply from their packaging.
Power and Connectivity Setup
Connect the Power supply
Connect the Power supply to the power input on the back connectors of Reliq and then to a power source.
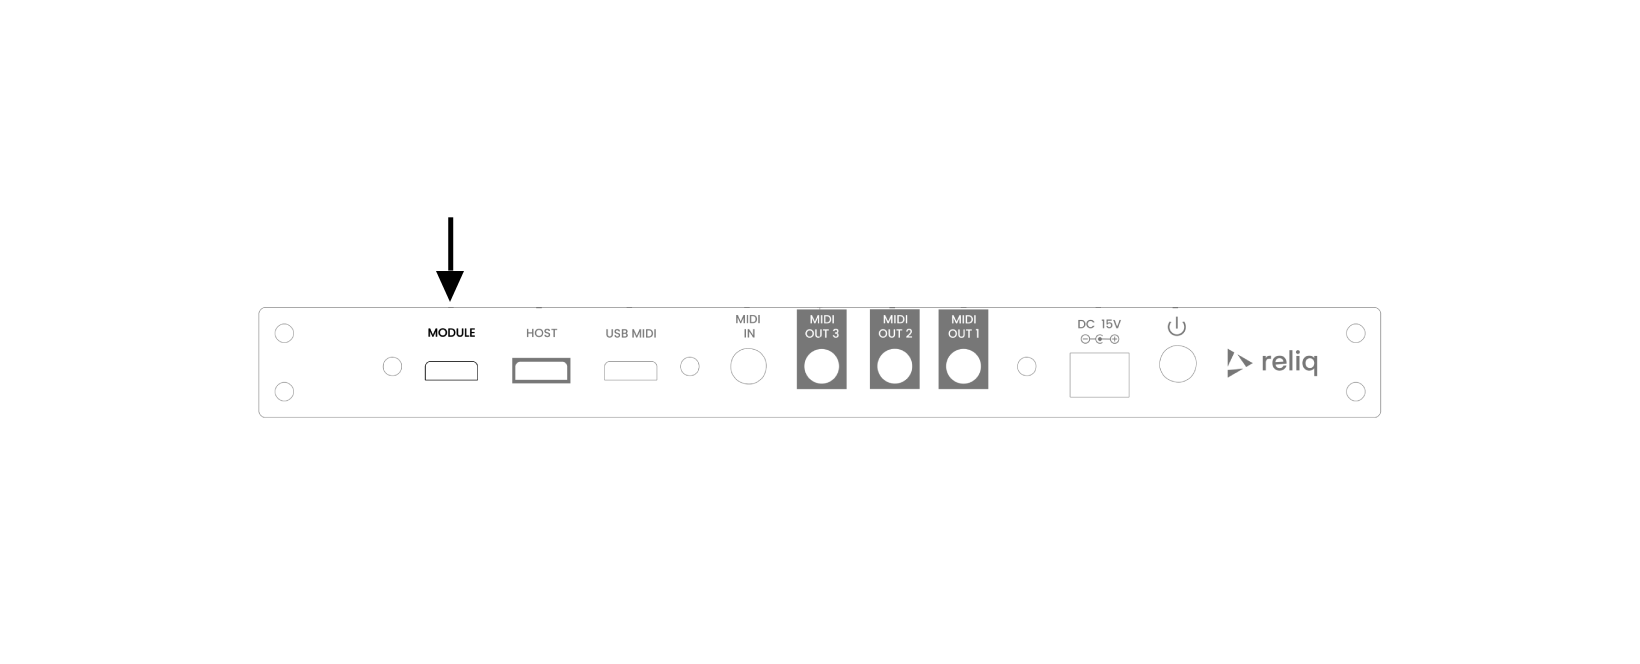
Connect the Breakout Module
Use the USB-C to USB-C cable to connect the back connectors of Reliq to the Breakout Module. Plug one end into the MODULE output on Reliq and the other end into the USB-C connector of the Breakout Module.
Connecting Devices
Connect MIDI Devices
Use TRS-MIDI cables to connect your MIDI devices to the back connectors of Reliq. You can connect to any of the three MIDI outputs: MIDI OUT 1, MIDI OUT 2, or MIDI OUT 3.

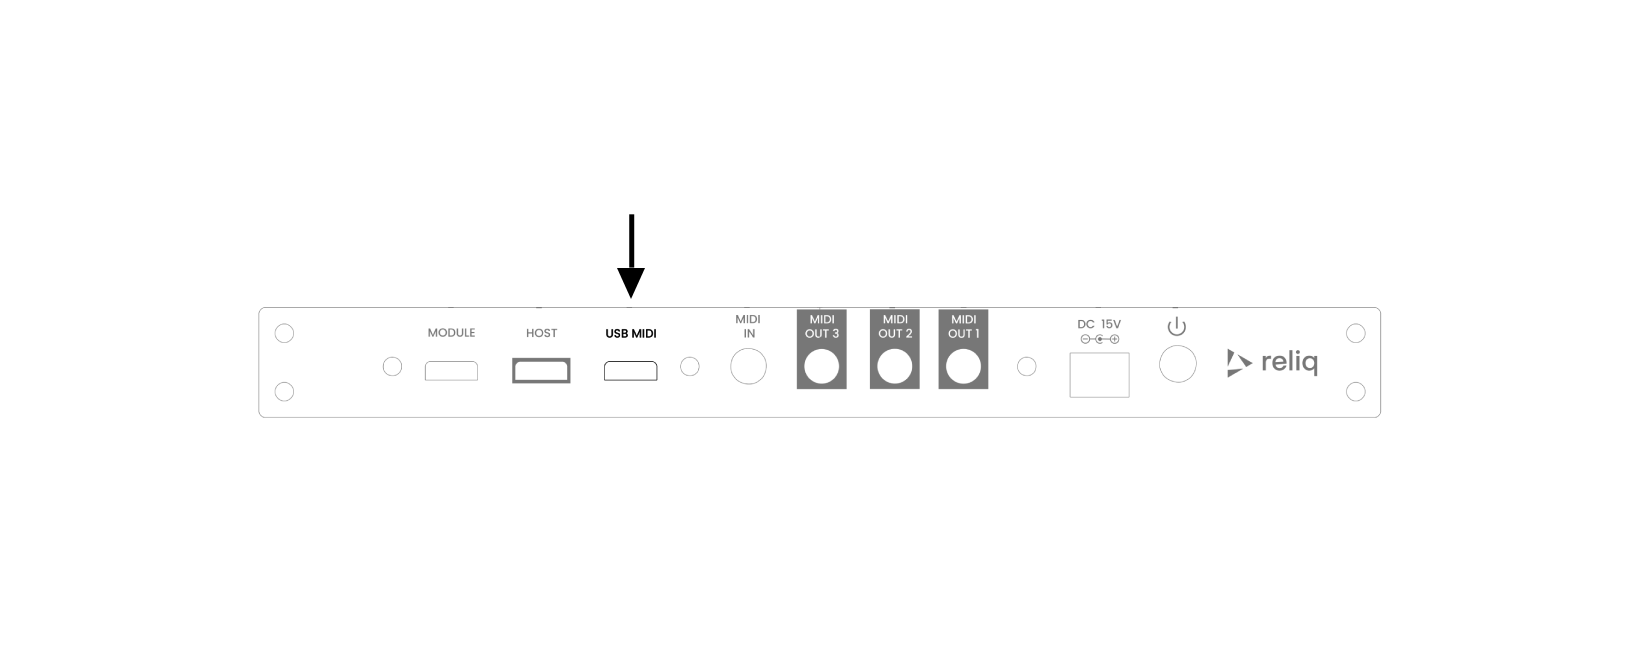
Connect USB MIDI Devices
Plug any USB MIDI devices into the USB MIDI port on the back connectors of Reliq.
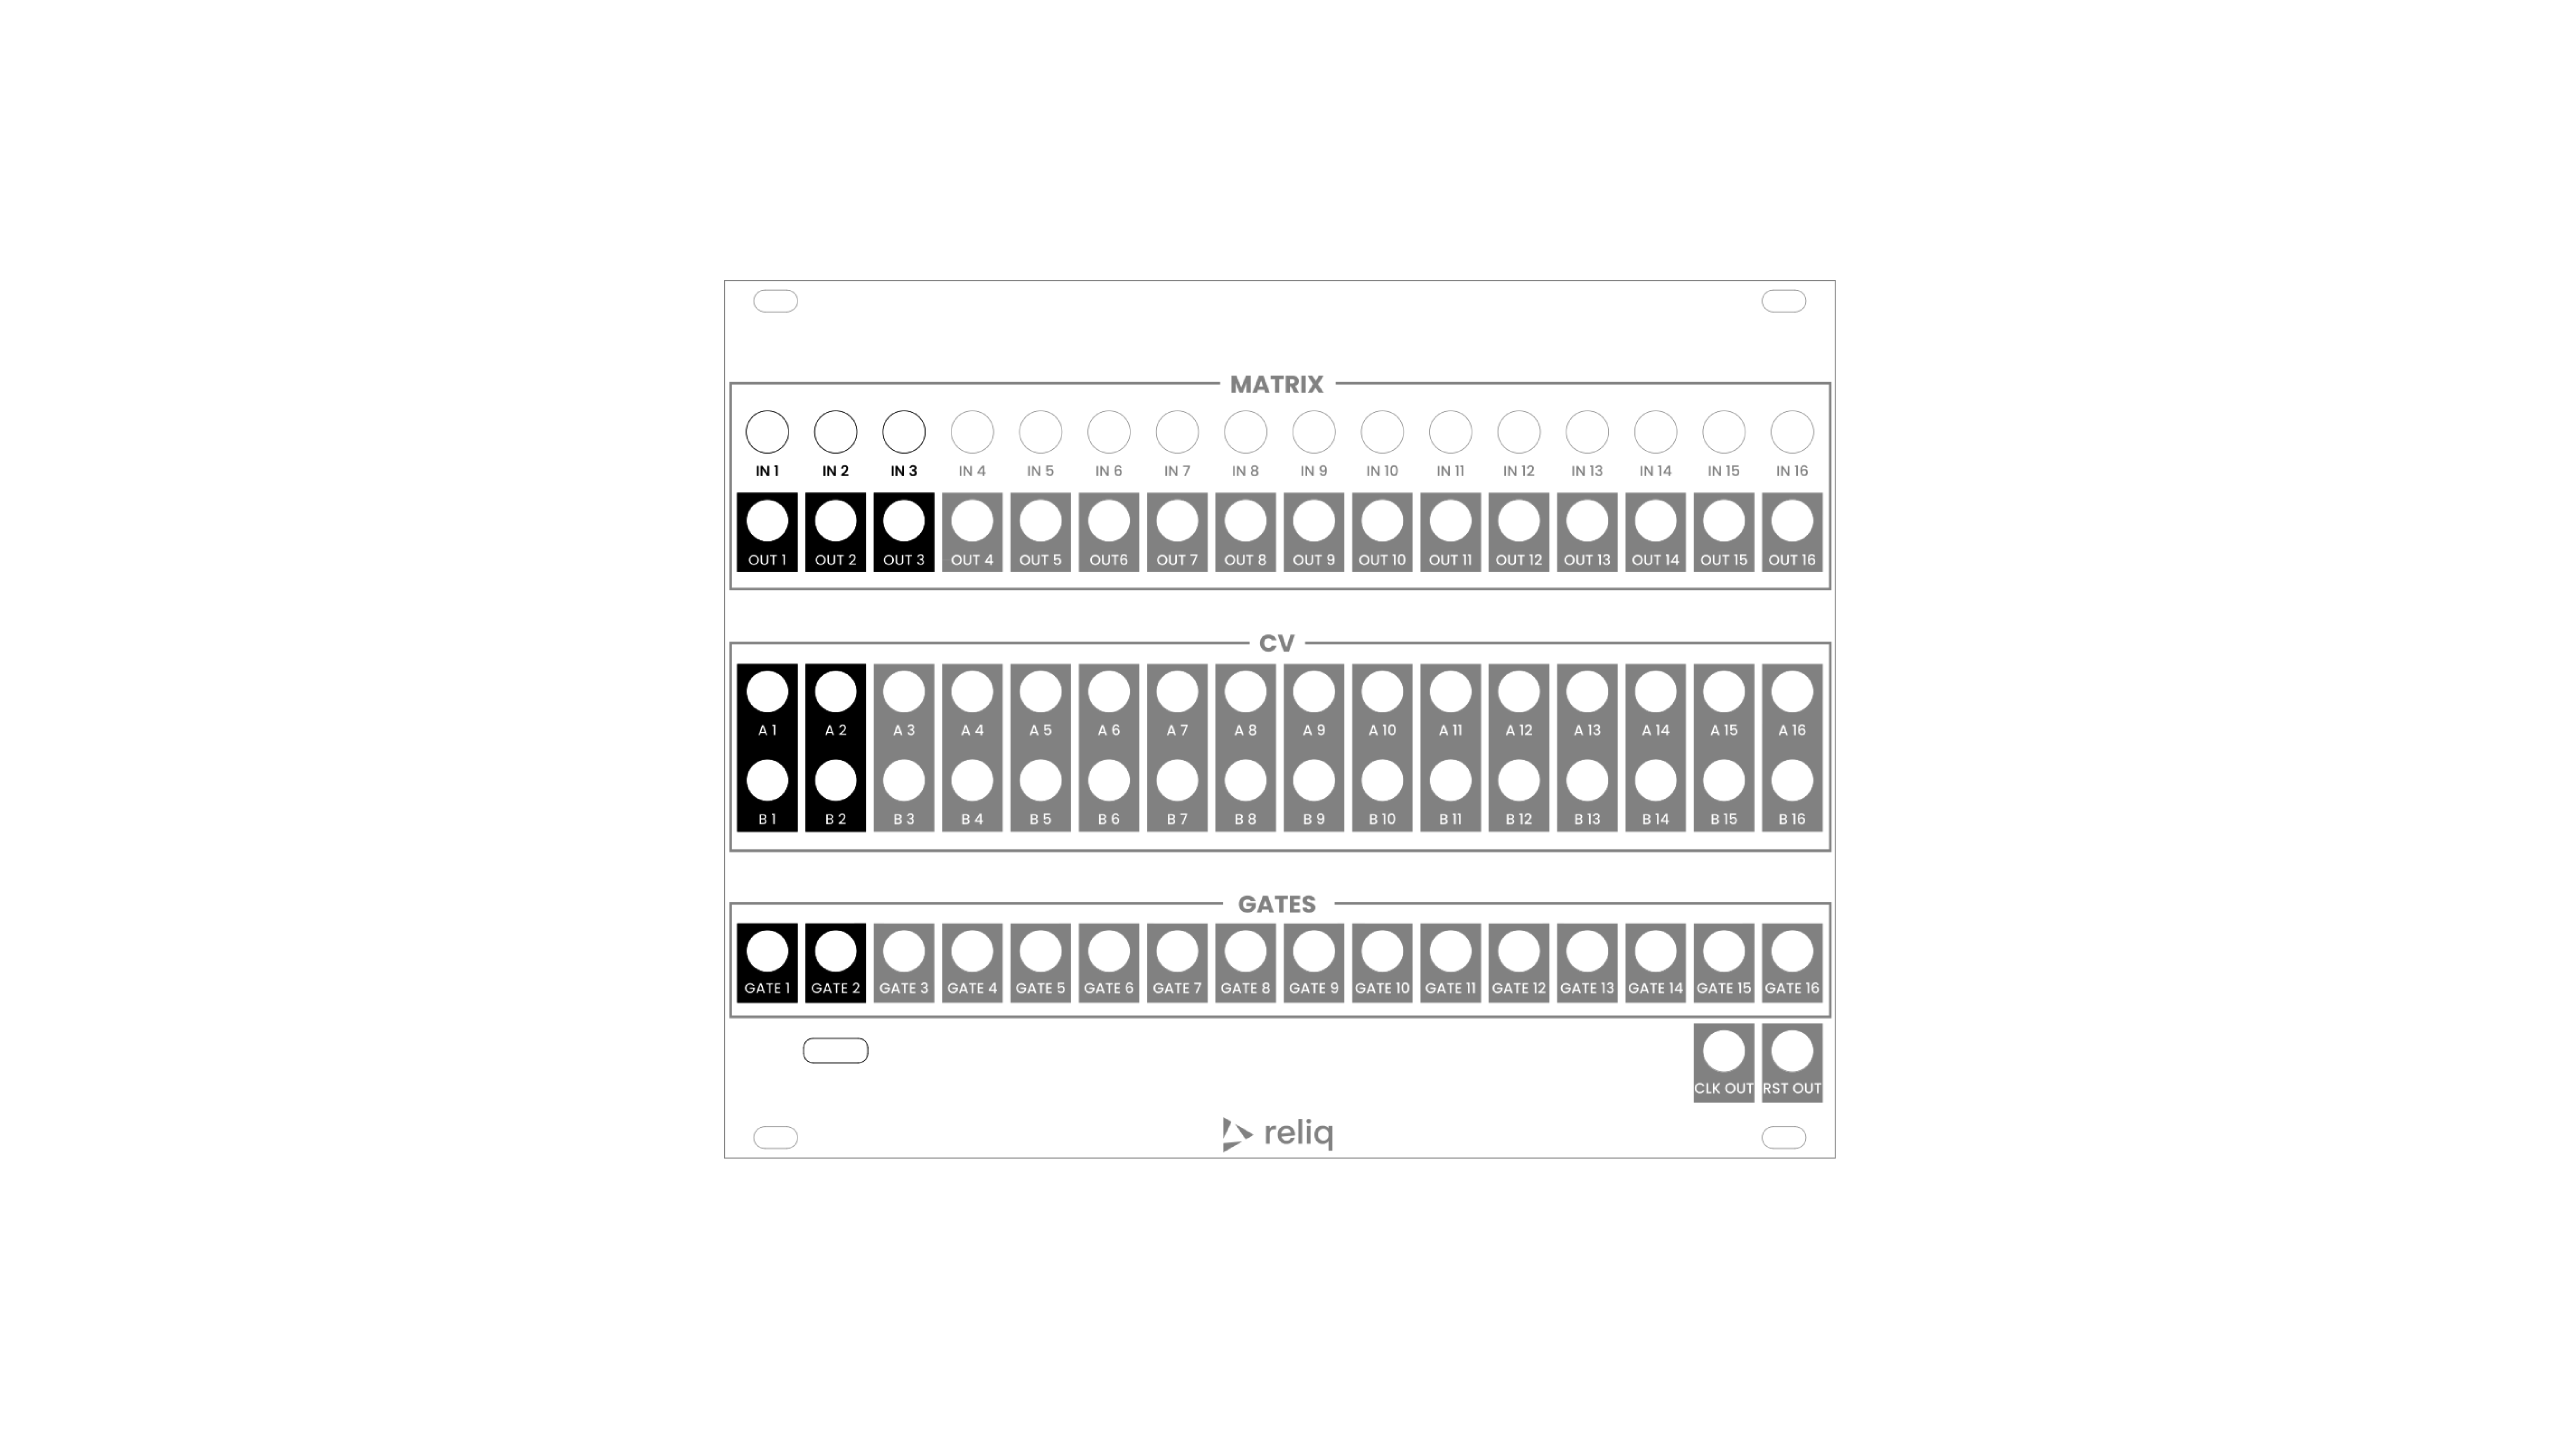
Breakout Module Connections
On the Breakout Module, connect audio signals to the Matrix Inputs and Outputs.
You can also connect control voltage (CV) equipment to the CV Outputs and any gate-enabled devices to the Gate Outputs.
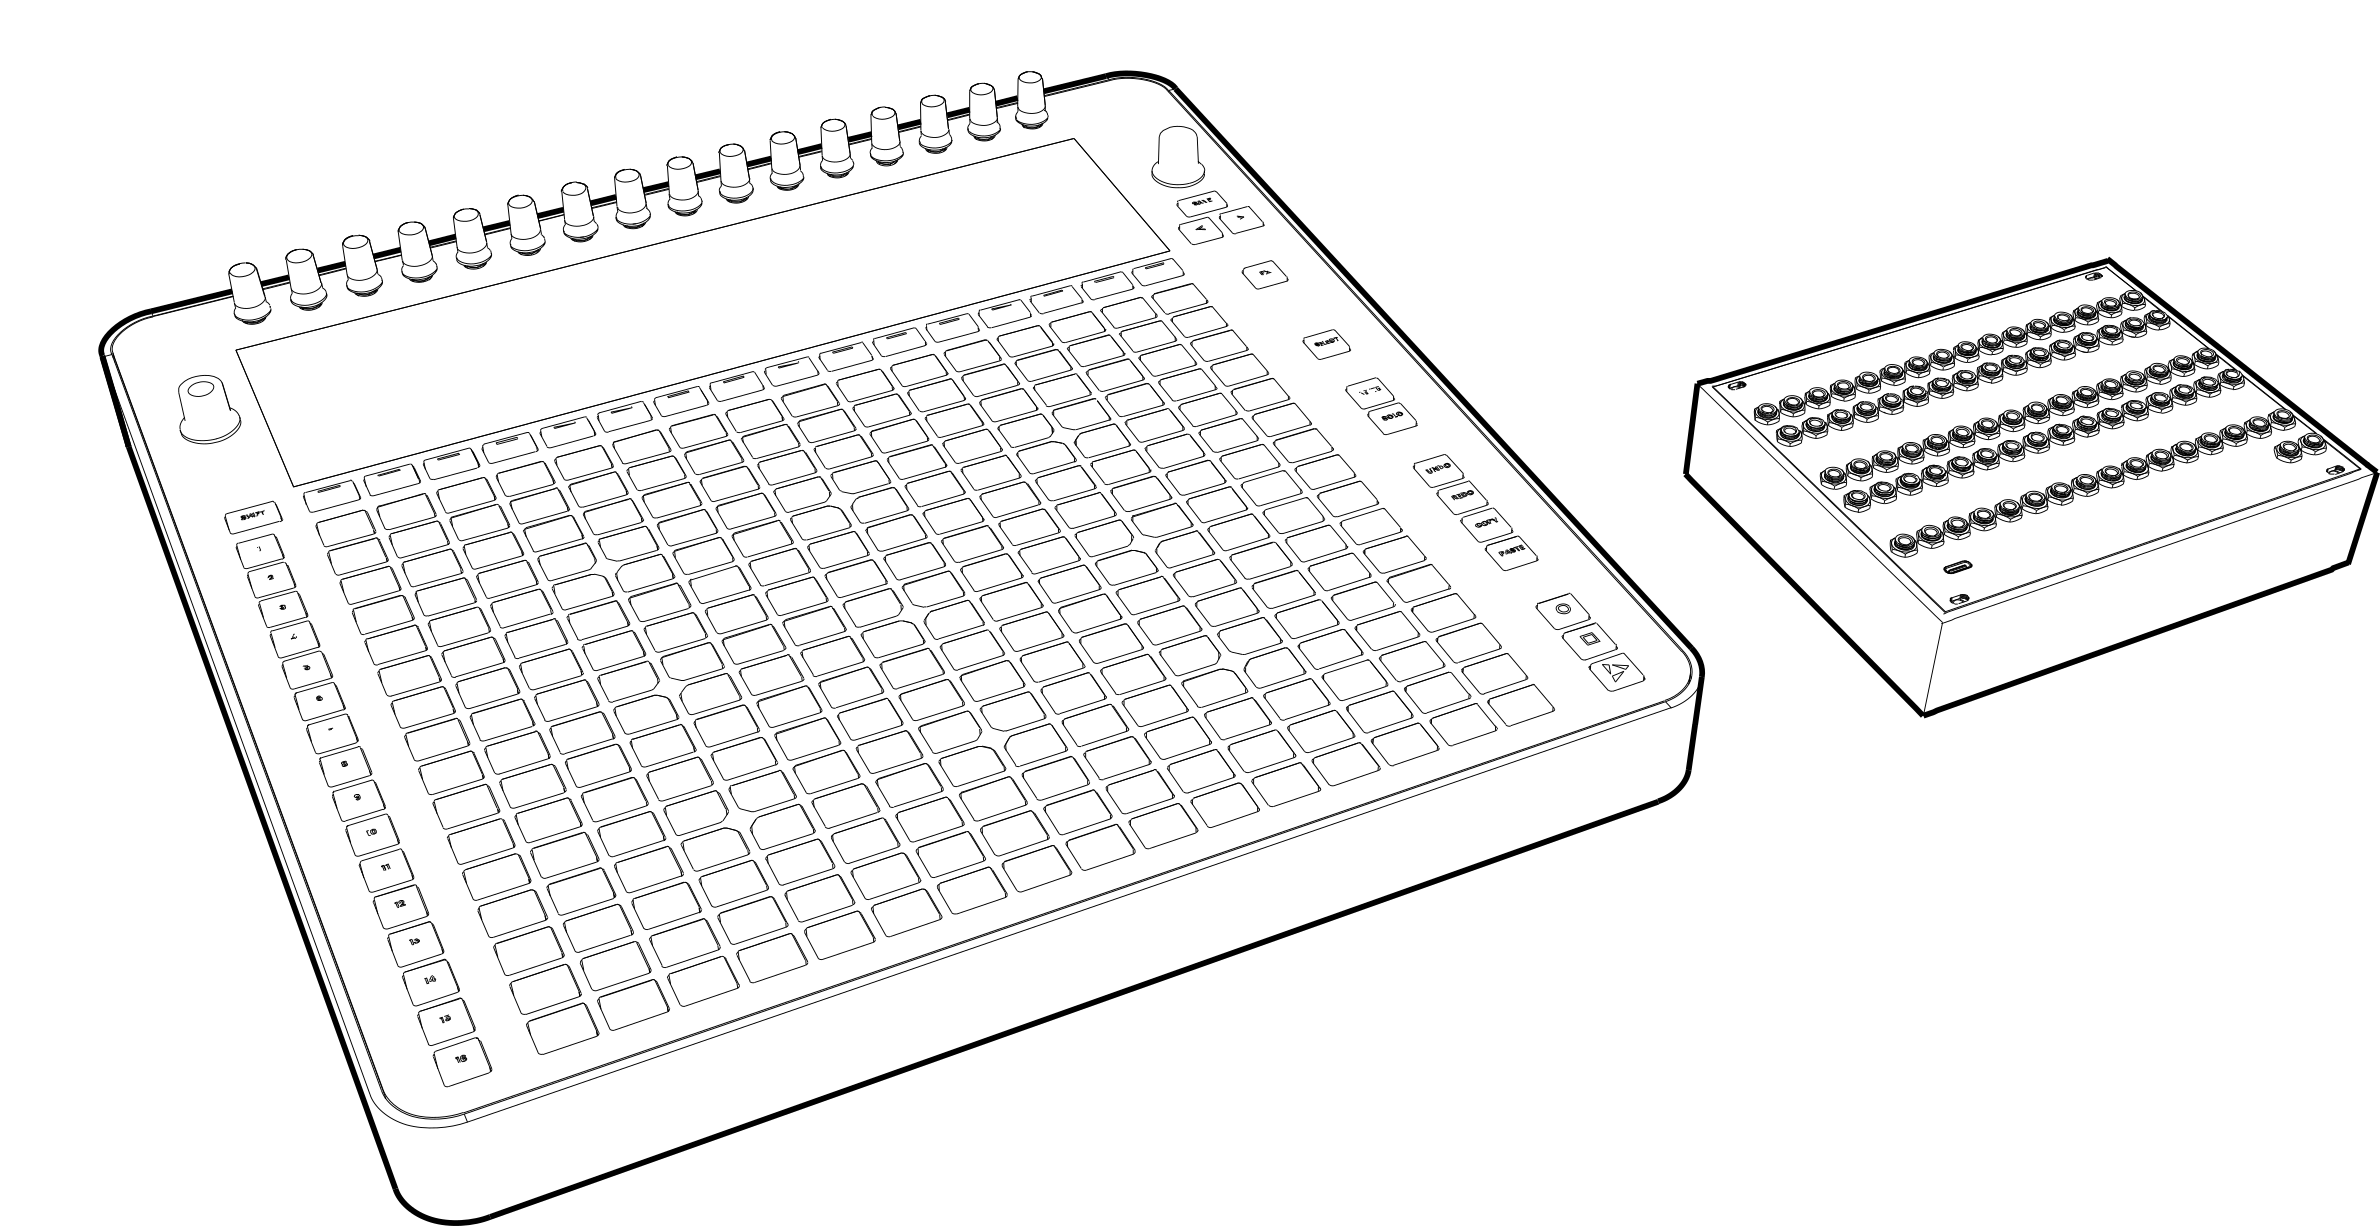
Interface Overview
The physical interface of Reliq is composed of seven main elements:
Encoders
Page buttons
The Grid Pads
Track buttons
Function buttons , , , , , , , ,
Joystick Encoder , , , ,
BPM Encoder
Each of these components has a specific role in controlling Reliq’s parameters and navigating its functions.
Encoders
Sixteen Encoders are positioned at the top of the interface, directly above the screen. These encoders correspond to the parameters displayed on the screen for each active page. Adjustments to parameters such as pitch, velocity, or other settings are made by turning the encoder aligned with the relevant parameter on the screen. These encoders can have a click action (push in). In all functions where the encoders can be clicked in, a “•” will be shown on the screen to indicate this action.
Grid Pads
The Grid Pads serve as the primary interface for event management. It is used for various functions, including connection management in the Matrix Page and pattern arrangement in the Sequencer Page. Each row and column of the grid is mapped to a specific input, output, or event, depending on the active page. The grid can be used to create and manage connections or patterns, allowing for direct interaction with signal routing or sequencing.

Joystick Encoder
The Joystick Encoder in on the upper right corner of the interface, adjacent to the screen. The joystick encoder can be rotated and clicked in four directions (up , down , left , right ). This component is primarily used for navigating between different menus, nodes, or settings on the screen.
BPM Encoder
On the left side of the interface, there is the BPM Encoder . This illuminated encoder is dedicated to setting the tempo (Beats Per Minute) of the system. Turning the encoder adjusts the BPM, which controls the overall timing of sequences and events. The illuminated feedback ensures that the current mode (FOLLOW / EDIT) of Reliq is always visible.
Quick walkthrough
Powering On and Basic Operation
Power On Reliq
After all connections are made, press the power button on Reliq. The device will boot up and load a new project by default.
Navigating to the Sequencer Page
Once powered on, Reliq will land on the Sequencer Page. This is where you can begin building your sequences.
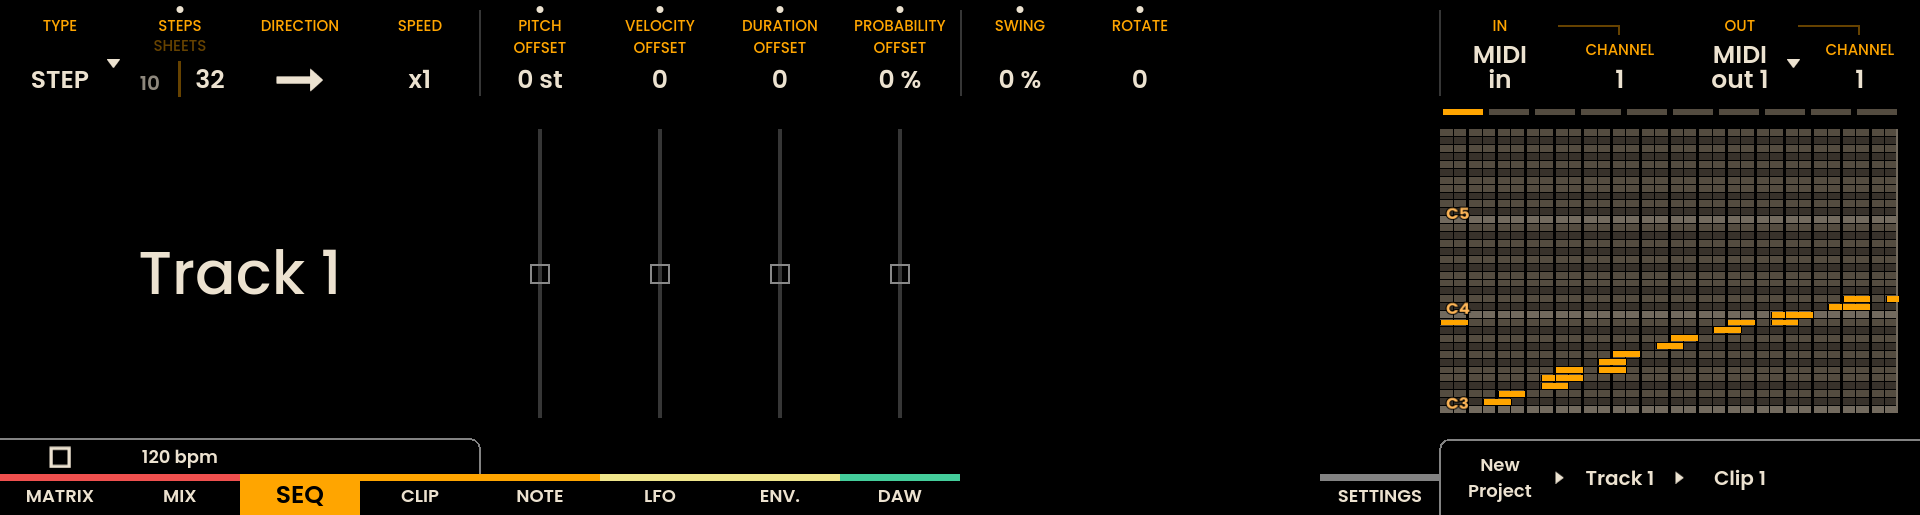
Selecting a Track and MIDI Output
Select your desired track using the Track buttons on the left side of the interface . (For example, press the 1 button to select Track 1).
Press the first encoder above the Gear icon on the top-left of the screen to enter the Track Settings panel.
Use the upper-right encoder (above the OUT legend on the display) to select a MIDI output for your track.
Entering and Playing Events
To input events, press the LED buttons on the grid that correspond to steps in the sequence.

After entering events, press the Play Button to listen to the sequence. MIDI messages will be sent to the connected devices as programmed.
Matrix Routing
Access the Matrix Page
To configure the matrix, press the Matrix Page Page button on the top left side of the interface. This will take you to the Matrix Page.
Making Connections
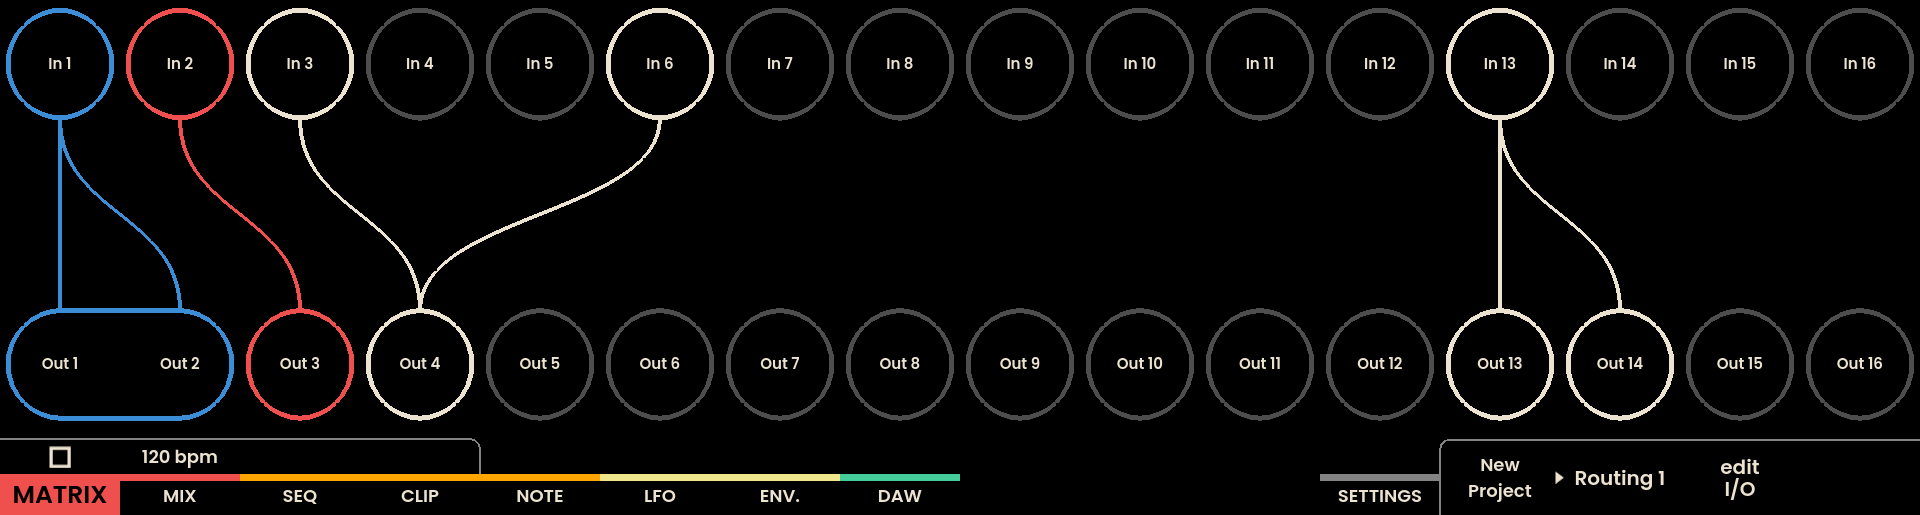
The matrix shows an XY grid of inputs and outputs. Press any button where an input and output intersect to connect them. This routes signals from that input to the selected output.
Alternatively, connections can be made directly via the screen: press and hold an input encoder to reveal output labels , then press a Page Button to connect that input to the corresponding output.

LFO and Envelope Modulation
Access the LFO Page
Press the LFO Page button located at the upper middle part of the interface, just below the “LFO” legend on the screen.
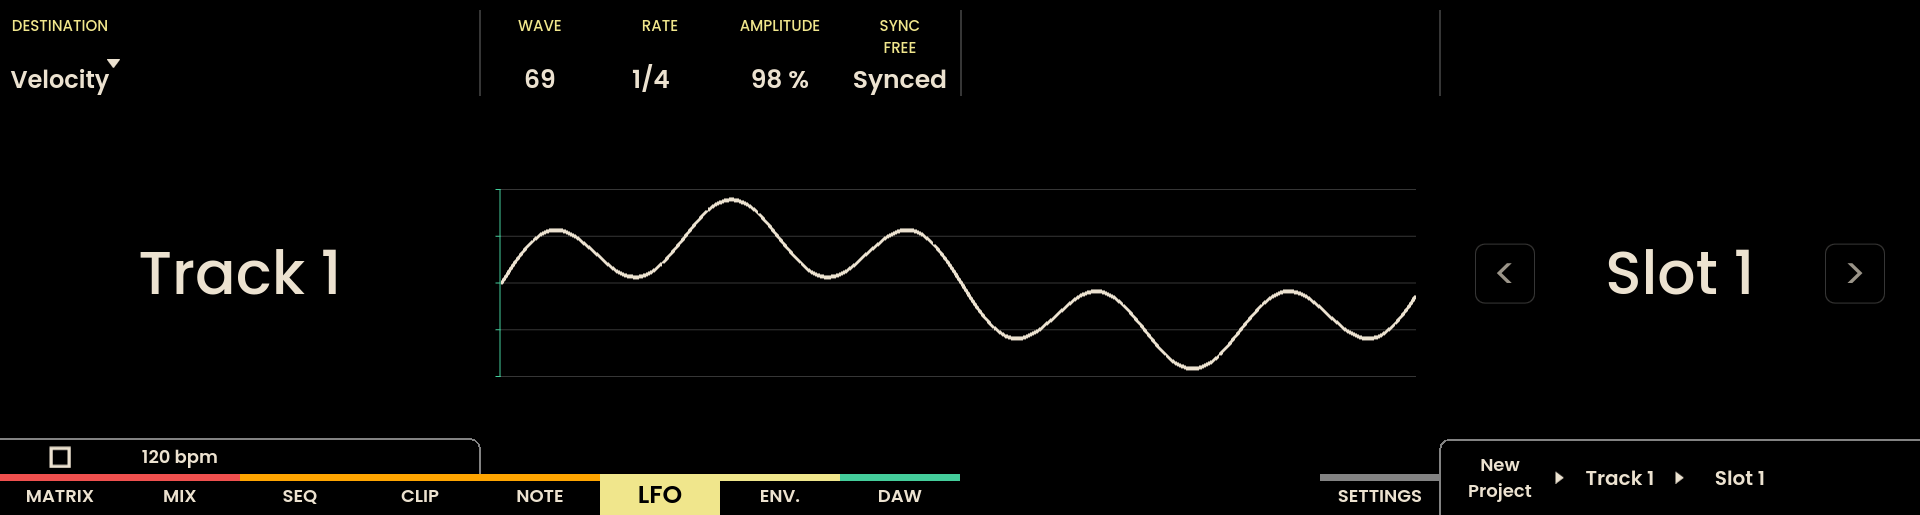
Setting LFO Parameters
Once on the LFO Page, you can select the destination of the LFO modulation, and adjust the Rate and Amplitude to your desired values. These will modulate your connected devices accordingly. You can select a track using the Track buttons on the left side of the interface.
Access the Envelope Page
To work with Envelopes, press the Envelope Page button located just below the ENV legend on the screen.
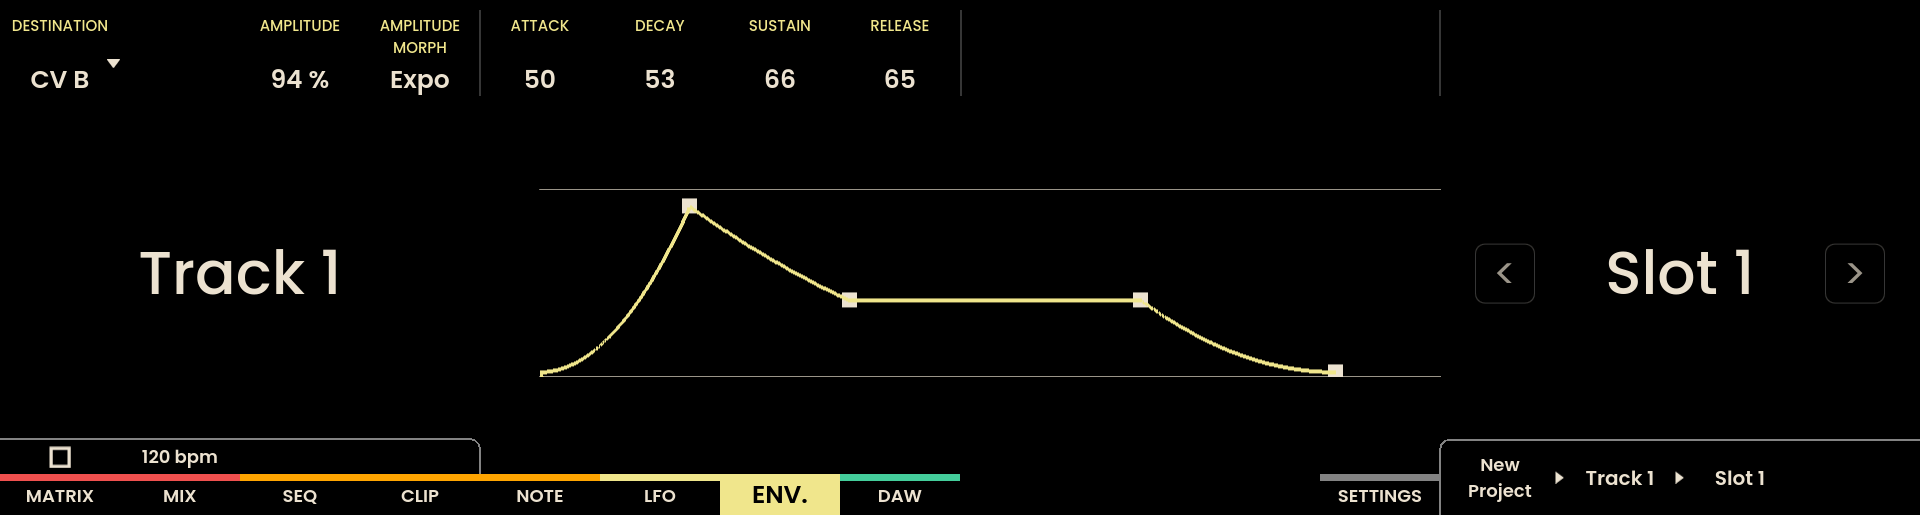
Setting Envelope Parameters
On the Envelope Page, you can similarly choose the destination for your envelopes, and set parameters like Attack, Decay, Sustain, and Release to create dynamic modulation patterns.
Now that you’re familiar with the basics, you’re ready to explore the full potential of Reliq!